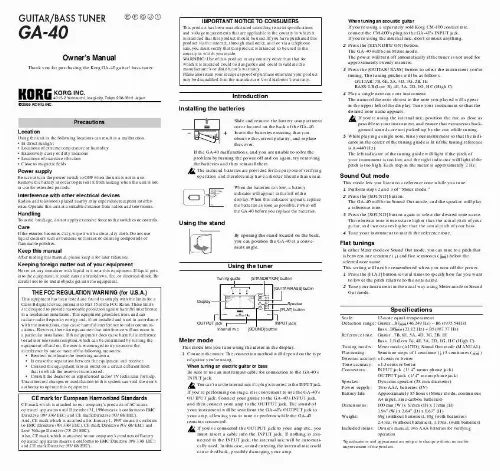
Les instructions détaillées pour l'utilisation figurent dans le Guide de l'utilisateur.
IMPORTANT NOTICE TO CONSUMERS
This product has been manufactured according to strict specifications and voltage requirements that are applicable in the country in which it is intended that this product should be used. If you have purchased this product via the internet, through mail order, and/or via a telephone sale, you must verify that this product is intended to be used in the country in which you reside. WARNING: Use of this product in any country other than that for which it is intended could be dangerous and could invalidate the manufacturer's or distributor's warranty. Please also retain your receipt as proof of purchase otherwise your product may be disqualified from the manufacturer's or distributor's warranty.
2
Owner's Manual
Thank you for purchasing the Korg GA-40 guitar/bass tuner.
3
4015-2 Yanokuchi, Inagi-city, Tokyo 206-0812 Japan
Introduction Installing the batteries
4
2005 KORG INC.
Precautions
Location
Using the unit in the following locations can result in a malfunction. · In direct sunlight · Locations of extreme temperature or humidity · Excessively dusty or dirty locations · Locations of excessive vibration · Close to magnetic fields
Slide and remove the battery compartment cover located on the back of the GA-40. Insert the batteries ensuring that you observe the correct polarity, and replace the cover. If the GA-40 malfunctions, and you are unable to solve the problem by turning the power off and on again, try removing the batteries and then reinstall them. The included batteries are provided for the purpose of verifying operation and therefore may have a shorter lifetime than usual. When the batteries run low, a battery indicator will appear in the left of the display. When this indicator appears, replace the batteries as soon as possible. Power-off the GA-40 before you replace the batteries.
5
When tuning an acoustic guitar If you're using a separately sold Korg CM-100 contact mic, connect the CM-100's plug to the GA-40's INPUT jack. If you're using the internal mic, don't connect anything. Press the [STANDBY/ON] button. The GA-40 will be in Meter mode. The power will turn off automatically if the tuner is not used for approximately twenty minutes. Press the [GUITAR/BASS] button to select the instrument you're tuning. The tuning pitches will be as follows. GUITAR: 7B, 6E, 5A, 4D, 3G, 2B, 1E BASS: LB (Low B), 4E, 3A, 2D, 1G, HC (High C) Play a single note on your instrument. The name of the note closest to the note you played will appear in the upper left of the display. Tune your instrument so that the desired note name appears. If you're using the internal mic, position the mic as close as possible to your instrument, and ensure that extraneous background sounds are not picked up by the mic while tuning. While playing a single note, tune your instrument so that the indicator in the center of the tuning guide is lit (if the tuning reference is A=440 Hz). The left indicator of the tuning guide will light if the pitch of your instrument is too low, and the right indicator will light if the pitch is too high. Each step in the meter is approximately 2 Hz.
Power supply
Be sure to turn the power switch to OFF when the unit is not in use. Remove the battery in order to prevent it from leaking when the unit is not in use for extended periods.
Sound Out mode
This mode lets you listen to a reference tone while you tune. 1 Perform steps 2 and 3 of "Meter mode." 2 Press the [SOUND] button. The GA-40 will be in Sound Out mode, and the speaker will play a reference tone. 3 Press the [SOUND] button again to select the desired note name. The reference tone is one octave higher than the actual pitch of your guitar, and two octaves higher than the actual pitch of your bass. 4 Tune your instrument to match the reference tone.
Interference with other electrical devices
Radios and televisions placed nearby may experience reception interference. Operate this unit at a suitable distance from radios and televisions.
Handling
To avoid breakage, do not apply excessive force to the switches or controls.
Care
If the exterior becomes dirty, wipe it with a clean, dry cloth. Do not use liquid cleaners such as benzene or thinner, or cleaning compounds or flammable polishes.
Using the stand
By opening the stand located on the back, you can position the GA-40 at a convenient angle.
Flat tunings
In either Meter mode or Sound Out mode, you can tune to a pitch that is between one semitone ( ) and five semitones ( ) below the selected note name. This setting will not be remembered when you turn off the power. 1 Press the [FLAT] button several times to specify how far you want to lower the pitch relative to the note name. 2 Tune your instrument in the usual way using Meter mode or Sound Out mode.
Keep this manual
After reading this manual, please keep it for later reference.
Keeping foreign matter out of your equipment
Never set any container with liquid in it near this equipment. If liquid gets into the equipment, it could cause a breakdown, fire, or electrical shock. Be careful not to let metal objects get into the equipment.
Using the tuner
Tuning guide [STANDBY/ON] button [GUITAR/BASS] button Display
THE FCC REGULATION WARNING (for U.S.A.)
This equipment has been tested and found to comply with the limits for a Class B digital device, pursuant to Part 15 of the FCC Rules. These limits are designed to provide reasonable protection against harmful interference in a residential installation. This equipment generates, uses, and can radiate radio frequency energy and, if not installed and used in accordance with the instructions, may cause harmful interference to radio communications. However, there is no guarantee that interference will not occur in a particular installation. If this equipment does cause harmful interference to radio or television reception, which can be determined by turning the equipment off and on, the user is encouraged to try to correct the interference by one or more of the following measures: · Reorient or relocate the receiving antenna. · Increase the separation between the equipment and receiver. · Connect the equipment into an outlet on a circuit different from that to which the receiver is connected. · Consult the dealer or an experienced radio/TV technician for help. Unauthorized changes or modification to this system can void the user's authority to operate this equipment.
Speaker [FLAT] button INPUT jack [SOUND] button
Specifications
Scale: 12-note equal temperament Detection range: Guitar...B1 (46.249 Hz)  B6 (1975.54Hz) Bass...B0 (23.12 Hz)  B5 (987.77 Hz) Reference tone: Guitar...7B, 6E, 5A, 4D, 3G, 2B, 1E Bass...LB (Low B), 4E, 3A, 2D, 1G, HC (High C) Tuning modes: Meter mode (AUTO), Sound Out mode (MANUAL) Flat tuning: Semitone steps of 1 semitone ( ) 5 semitones ( ) Detection accuracy: ±1 cents or better Tone accuracy: ±1.5 cents or better Connectors: INPUT jack (1/4" mono phone jack) OUTPUT jack (1/4" mono phone jack) Speaker: Dynamic speaker (28 mm diameter) Power supply: Two AAA batteries (3V) Battery life: Approximately 85 hours (Meter mode, continuous A4 input, zinc-carbon batteries) Dimensions: 100 mm (W) x 67mm (D) x 17mm (H) 3.94" (W) x 2.64" (D) x 0.67" (H) Weight: 69g (without batteries), 88g (with batteries) 2.43oz. (without batteries), 3.10oz. (with batteries) Included items: Owner's manual, two AAA batteries for verifying operation
*Specifications and appearance are subject to change without notice for improvement of the product.
OUTPUT jack Internal mic
Meter mode
This mode lets you tune using the meter in the display. 1 Connect the tuner. The connection method will depend on the type of guitar you're using. When tuning an electric guitar or bass Be sure to use an instrument cable for connection to the GA-40's INPUT jack. You can't use the internal mic if a plug is inserted in the INPUT jack. If you're performing on stage, it is convenient to use the GA-40's OUTPUT jack. Connect your guitar to the GA-40's INPUT jack, and then connect your amp to the OUTPUT jack. The sound of your instrument will be sent from the GA-40's OUTPUT jack to your amp, allowing you to tune or perform while the GA-40 remains connected. If you've connected the OUTPUT jack to your amp etc., you must insert a cable into the INPUT jack. If nothing is connected to the INPUT jack, the internal mic will be automatically used. In this case, sound entering the internal mic could cause feedback, possibly damaging your amp.
CE mark for European Harmonized Standards
CE mark which is attached to our company's products of AC mains operated apparatus until December 31, 1996 means it conforms to EMC Directive (89/336/EEC) and CE mark Directive (93/68/EEC). And, CE mark which is attached after January 1, 1997 means it conforms to EMC Directive (89/336/EEC), CE mark Directive (93/68/EEC) and Low Voltage Directive (73/23/EEC). Also, CE mark which is attached to our company's products of Battery operated apparatus means it conforms to EMC Directive (89/336/EEC) and CE mark Directive (93/68/EEC).
Manuel D'utilisation
Merci d'avoir fait l'acquisition de l'accordeur pour guitare et basse GA-40 Korg.
Précautions
Emplacement
L'utilisation de cet instrument dans les endroits suivants peut en entraîner le mauvais fonctionnement. · En plein soleil · Endroits très chauds ou très humides · Endroits sales ou fort poussiéreux · Endroits soumis à de fortes vibrations · A proximité de champs magnétiques
Si le GA-40 ne fonctionne pas et si vous n'arrivez pas à corriger le problème en mettant à plusieurs reprises l'appareil hors et sous tension, essayez d'enlever puis de remettre les piles en place. Les piles fournies sont destinées à vérifier le bon fonctionnement de votre appareil. Il est possible que leur durée de vie soit plus courte que la normale. Lorsque les piles sont faibles, le symbole de la pile apparaît dans la partie gauche de l'afficheur. Remplacez alors les piles dès que possible. Mettez le GA-40 hors tension avant de remplacer les piles.
Utilisation du support
En ouvrant le support situé à l'arrière, vous pouvez incliner le GA-40 sous un angle permettant une lecture aisée de l'affichage.
Alimentation
Lorsque vous n'utilisez pas l'appareil, n'oubliez pas de le mettre hors tension. Retirez les piles pour éviter toute fuite lorsque l'appareil ne sera pas utilisé pendant de longues périodes de temps.
Interférences avec d'autres appareils électriques
Les postes de radio et de télévision situés à proximité peuvent par conséquent souffrir d'interférences à la réception. Veuillez dès lors faire fonctionner cet appareil à une distance raisonnable de postes de radio et de télévision.
3 Appuyez sur le commutateur [GUITAR/BASS] pour sélectionner l'instrument accordé. Notes détectées : GUITAR: 7B, 6E, 5A, 4D, 3G, 2B, 1E BASS: LB (Low B), 4E, 3A, 2D, 1G, HC (High C) 4 Jouez une note sur votre instrument. Le nom de la note s'en rapprochant le plus apparaîtra dans la partie supérieure gauche de l'afficheur. Accordez grossièrement votre instrument de telle manière que le nom de la note souhaitée apparaisse. Si vous utilisez le microphone interne, disposez votre instrument aussi près que possible du microphone et assurez-vous que les sons extérieurs ne puissent pas être captés pendant l'accord. 5 Tout en jouant une note sur votre instrument, accordez celui-ci de telle manière que la diode au centre du guide d'accord s'allume (si la fréquence de référence est A = 440 Hz). La diode à gauche s'allumera si la hauteur de la note produite par votre instrument est trop basse et celle à droite si elle est trop élevée. Chaque graduation du compteur représente environ 2 Hz.
Mode Son Utilisation de l'accordeur
Guide d'accord Commutateur [STANDBY/ON] Commutateur [GUITAR/BASS]
Ce mode vous permet d'écouter une note de référence pendant l'accord. 1 Effectuez les opérations 2 et 3 de "Mode Compteur". 2 Appuyez sur le commutateur [SOUND]. Le GA-40 passera en mode Son et le haut-parleur produira une note de référence. 3 Appuyez sur le commutateur [SOUND] pour sélectionner le nom de la note souhaitée. La note de référence est une octave plus haut que la la note produite par votre guitare, et deux octaves plus haut que celle produite par votre basse. 4 Accordez votre instrument sur la hauteur de la note de référence entendue.
Maniement
Pour éviter de les endommager, manipulez les commandes et les boutons de cet instrument avec soin.
Entretien
Lorsque l'instrument se salit, nettoyez-le avec un chiffon propre et sec. Ne vous servez pas d'agents de nettoyage liquides tels que du benzène ou du diluant, voire des produits inflammables.
Afficheur
Conservez ce manuel
Après avoir lu ce manuel, veuillez le conserver soigneusement pour toute référence ultérieure.
Haut-parleur Touche [FLAT] Prise INPUT
Evitez toute intrusion d'objets ou de liquide
Ne placez jamais de ...